Build Environment
Summary
My build server is our existing Ansible host. I've set that system up several years ago - so I may have missed a step or two here. I'll try to recreate this from scratch later though.
Install and Configure git
We keep our code for git in an internal git repository running Bitbucket Server. We make enough changes to CAS and Ansible that I would be insane to not use git or some other form of version control for development. Whether you do or not is up to you - but the instructions here assume you are using some sort of git repository.
If you aren't familiar with Git - I recommend Pro Git, available online for free via (https://git-scm.com/book/en/v2).
Install and basic configuration of Git
This should be done as the user you are going to be running Ansible and building CAS from - NOT root.
  yum install git
  git config --global user.name "Your Name Here"
  git config --global user.email "Your Email Here"
Install Ansible
We are using the version of Ansible that comes with RedHat. This was just installed via:
yum install ansible
Set up SSH public key authentication
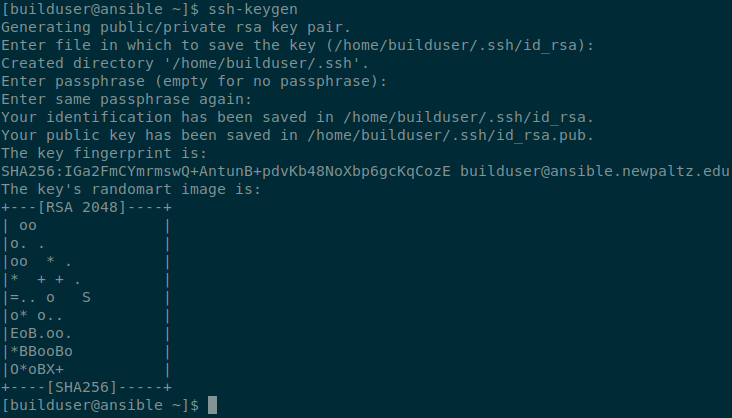
If you're deploying via Ansible, or just using SCP/SFTP to copy files over, you'll want to set up public key authentication.
From the master server:

When done - view the contents of the public key (by default in /home/username/.ssh/id_rsa.pub) - you'll need it in the next step.
From the CAS servers:
Edit the file /root/.ssh/authorized_keys Place the contents of the public key in that file.
Test
Login to your build server as the user you will be building CAS and running ansible from (I'll use 'builduser' as an example here). See if you can login to one of your newly built CAS servers without entering a password.
ssh root@cas6dev1
If successful - you'll be logged in without a username or password. If this is the first time you are connecting via SSH from the build host to the CAS host, you'll be warned that the authenticity of the host cannot be established, and you'll be prompted to enter yes to continue connecting.
Don't forget to commit changes
I'm not going to mention committing changes into Git during the rest of this documentation. It's up to you as to when you commit - but I usually recommend as you're getting things setup after each 'phase' of the install.